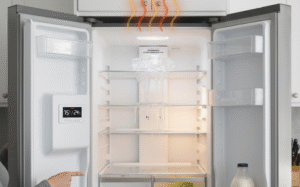
A refrigerator not cooling is one of the most frustrating—and potentially costly—appliance problems. Food safety is threatened, groceries spoil quickly, and energy use skyrockets as the fridge works harder in vain. According to food safety guidelines, refrigerators should be kept at or below 40°F while freezers should stay at 0°F for safe food storage.
When your fridge fails to cool, it can stem from simple, fixable issues or complex, expensive breakdowns. This in-depth guide takes you through the most important checks first, then dives into specific parts that commonly fail, maintenance habits that prevent breakdowns, and finally—when to repair versus replace.
Top Warning Signs Your Refrigerator Is Not Cooling
- Food warmer than usual: Even if thermostat settings are normal.
- Excess frost buildup: Heavy frost in the freezer compartment points to airflow or defrost issues.
- Constantly running motor: Compressor never cycles off, indicating temperature control or refrigerant issues.
- Clicking/buzzing sounds: Start relay or compressor struggling.
- Skyrocketing electric bills: Poor efficiency raises costs even before cooling completely fails.
- Condensation inside: Leaking or poorly sealing doors allow warm air inside.
- Milk spoils fast or soft ice cream: Clear food safety red flags.
⚠️ Safety First: What You’ll Need Before Troubleshooting
Essential Tools:
Multimeter (for continuity testing), screwdrivers (Phillips & flathead), refrigerator coil cleaning brush, vacuum with attachment, flashlight, appliance thermometer, and a carpenter’s level.
Safety Gear:
Work gloves, protective goggles, and knee pads for comfort—especially when accessing heavy lower panels.
Step-by-Step Refrigerator Cooling Diagnostic
Stage 1: Basic Checks (5–10 minutes)
- Verify the fridge is plugged in and interior light works.
- Confirm thermostat setting is between 32–40ºF.
- Inspect door gaskets for damage or dirt buildup.
- Ensure 2–3 inches clearance for ventilation space behind and above fridge.
Stage 2: Intermediate Checks (30–60 minutes)
- Clean condenser coils: dirt forces compressor into overdrive.
- Check air vents: blocked vents reduce airflow between fridge/freezer.
- Level the unit: doors must close properly, uneven tilt may cause gaps.
- Check frost: excessive buildup points to defrost system failures.
Stage 3: Advanced Diagnostics (1–2 hours)
- Test evaporator & condenser fans with multimeter.
- Inspect compressor start relay, listening for clicking/rattling.
- Check thermostat continuity with ice-water test.
- Note compressor temperature: overheating may indicate failure.
Stage 4: Professional Help
Sealed system problems, refrigerant leaks, or control board failures require a certified technician. Do not attempt to handle refrigerant yourself—EPA regulations and health concerns make it unsafe.
7 Common Causes & DIY Fixes Explained in Detail
1. Thermostat Failure
Function: Regulates compressor cycles to maintain proper temperature.
Symptoms: Compressor not cycling, fridge freezing items, or interior too warm.
Fix: Test with a multimeter: a lack of continuity indicates replacement needed.
Cost: $100–$400 (including part & labor).
2. Evaporator Fan Motor
Function: Moves cold air from freezer into refrigerator.
Symptoms: Freezer cold, fridge warm, unusual squealing or rattling.
Fix: Replace faulty motor if fan doesn’t spin freely or lacks continuity.
Cost: $150–$300.
3. Condenser Fan Problems
Function: Removes heat from condenser coils.
Symptoms: Compressor overheating, warm fridge despite running motor.
Fix: Clear obstructions, test with multimeter; replace if failing.
Cost: $150–$350.
4. Dirty Condenser Coils
Function: Dissipates heat—when dirty, efficiency plummets.
Fix: Vacuum and brush every 6 months; more with pets.
Cost: Almost $0 (just 20 minutes of cleaning).
5. Bad Start Relay
Function: Sends electrical surge to start compressor.
Symptoms: Clicking sound, compressor fails to kick on.
Fix: Replace if rattles when shaken or fails continuity test.
Cost: $50–$200.
6. Failed Compressor
Function: Heart of the cooling system, compressing refrigerant.
Symptoms: Runs hot, makes knocking/clicking, never cools.
Fix: Replacement only—requires technician.
Cost: $700–$1,250 (installed).
7. Refrigerant Leak
Danger: Environmental hazard + performance loss.
Symptoms: Oily residue, faint chemical odor, constant compressor running.
Fix: Certified technician only.
Cost: $400–$1,100 (repair + recharge).
Preventive Maintenance Schedule
- Weekly: Check door seals, listen for odd noises, confirm temperature stability.
- Monthly: Clean gaskets with warm soapy water, check freezer for frost buildup.
- Every 3–6 months: Vacuum condenser coils, test seals with the dollar-bill test.
- Annually: Deep clean, check electrical connections, call pro for inspection if fridge is older.
Repair vs. Replace: Cost Comparison
| Problem | Likely Cost | Repair or Replace? |
|---|---|---|
| Thermostat/Relay | $100–$400 | Repair |
| Fan Motors | $150–$350 | Repair (if fridge < 8 yrs) |
| Compressor | $700–$1,250 | Replace if unit > 10 yrs |
| Refrigerant Leak | $400–$1,100 | Repair by pro, consider replacement on older fridges |
FAQs – Refrigerator Not Cooling
Why is my fridge not cooling but freezer still works?
Usually an evaporator fan problem, failed air damper, or frost buildup obstructing airflow.
How often should I service or clean my refrigerator?
Clean condenser coils every 6 months; full inspection annually. More often if you have pets.
What’s the average lifespan of a refrigerator?
Most modern refrigerators last 10–15 years. High-end or built-in units may last 20+ years with care.
What temperature should a refrigerator be set to?
The safe zone is 37–40°F for fridges and 0°F for freezers.
Summary & Key Takeaways
Bottom line: A refrigerator not cooling demands immediate attention. Start with quick basics like thermostat checks and coil cleaning—frequently the cheapest solutions. If symptoms persist, systematically test fans, relays, and seals.
Call a professional for sealed system or refrigerant concerns. Attempting DIY with refrigerant is dangerous and illegal without certification.
Pro tip: If repair costs approach half the price of a new fridge, replacement is usually the smarter investment—especially with older, inefficient models. Preventive maintenance, especially cleaning coils and seals, remains the simplest way to extend your refrigerator’s life and avoid costly food spoilage.
Check us out for more at OneSouceApplianceParts.com
