Complete Step-by-Step Repair Guide for DIY Success
Electric ovens operate on 240 volts, which can be fatal. Always disconnect power at the circuit breaker and verify the oven display, lights, and clock are completely off before beginning any inspection or repair work. Never attempt electrical repairs while the unit is connected to power.
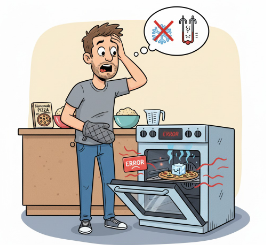
When your electric oven suddenly stops heating, **faulty heating elements are responsible for 65% of all cases**. Before calling a repair technician, you can often diagnose and fix the problem yourself with proper safety precautions and basic testing equipment. This comprehensive guide will walk you through systematic troubleshooting to identify whether your bake element, broil element, or another component is causing the heating failure.
Electric ovens require **240 volts of alternating current** supplied through two 120-volt legs to operate properly. The heating system consists of two main elements: the **bake element** (bottom) provides approximately 80% of the oven’s heating capacity, while the **broil element** (top) contributes about 20%.
When you select a cooking mode, the oven control board sends voltage to the appropriate element, causing it to heat and glow red-orange. Temperature is maintained through cycles controlled by either a temperature sensor or thermostat, which monitors internal temperature and signals the control board to turn elements on and off as needed.
Bake Element Issues: The bake element, located at the bottom, is the most common failure point. When it fails, your oven may heat poorly or not at all.
Broil Element Problems: If only the broil element is faulty, you may notice slightly longer cooking times but less dramatic heating issues.
Electric ovens operating on 240 volts can experience heating issues when one leg of voltage is interrupted by a tripped breaker or blown fuse. **There may be enough power to keep the display illuminated while preventing elements from heating**.
The oven temperature sensor probe can fail without warning, potentially causing error codes or complete heating failure. The sensor typically measures around **1,080 ohms at room temperature**.
Power surges from lightning strikes or electrical storms are a leading cause of electronic oven control board failure. When the control board fails, it may not send power to heating elements despite appearing to function normally.
Thermal fuses protect ovens from overheating by cutting power when temperatures exceed safe limits. **When blown, they prevent heating elements or the entire oven from receiving power**.
Surface blistering indicates wear from excessive heat or age
Visible damage is a definitive sign replacement is needed
Failed elements often show dark spots, blisters, or discoloration
Burns or scorch marks suggest overheating has occurred
Readings typically range from 19 to 115 ohms. A 2500W bake element should read approximately 20-25 ohms.
Display infinite resistance (no continuity) or near-zero resistance, indicating element failure.
The temperature sensor is a thin probe located at the back of the oven that functions as the oven’s thermostat. **Test the sensor by measuring resistance – it should read approximately 1,080 ohms at room temperature**.
To test for a grounded element, place one multimeter probe on the element’s outer surface and the other on an element terminal. **If continuity exists, the element has shorted and must be replaced**.
When heating elements and sensors test good, the control board may be faulty. Recent surveys indicate that **30% of oven issues are linked to faulty control boards**.
Electric ovens require **240 volts across two 120-volt legs**. The outlet should provide **220-240 volts between hot terminals** and **approximately 120 volts from each hot terminal to neutral**.
Voltage testing requires extreme caution and should only be performed by those comfortable with electrical systems. **Live voltage testing poses serious shock and electrocution hazards**. If you’re not comfortable working with electrical systems, contact a qualified electrician.
Check that both legs of the 240V circuit are functioning. A single tripped breaker can leave displays powered while preventing element heating.
Inspect terminal blocks for burnt or loose connections, which are common near heat sources.
Thermal fuses protect ovens from overheating by cutting power when temperatures exceed safe limits. **When blown, they prevent heating elements or the entire oven from receiving power**, often requiring complete replacement before the oven will function again.
The thermal fuse is typically located behind the rear access panel, often near the bake or broil element terminals. It appears as a **small plastic component with two wire terminals**.
Clean oven interior monthly to prevent buildup that can damage elements
Don’t line oven bottom with foil as it can cause overheating
Use self-cleaning feature sparingly as extreme temperatures stress components
Use gentle cleaning products to prevent element damage
Electric oven heating problems, while frustrating, are often diagnosable and repairable with proper knowledge and safety practices. **The most common cause is a burned-out heating element (65% of cases), which can often be determined by visual inspection combined with multimeter continuity testing**.
Remember that safety is paramount when dealing with 240-volt appliances. Always disconnect power at the circuit breaker before beginning any inspection or repair work. When in doubt, consult with qualified appliance repair professionals who have the experience and tools to diagnose complex electrical issues safely.
By following this systematic troubleshooting approach, you can often identify the root cause of your oven’s heating problems and make informed decisions about repair versus replacement options. Most heating element failures can be resolved with a $20-50 part and basic DIY skills, potentially saving hundreds in professional service calls.
Check us out for more appliance repair guides, parts, and expert advice at
Look for visible signs like blistering, cracks, or dark spots on the element. Turn your oven to bake mode and wait 3-5 minutes – a working element should glow bright red-orange. If it doesn’t glow or only parts glow, the element needs replacement. You can confirm with a multimeter test showing 20-25 ohms resistance for a good bake element.
Yes, replacing a heating element is generally safe for DIY repair if you follow proper safety procedures. Always disconnect power at the circuit breaker first, take photos of wire connections before removal, and ensure you purchase the correct replacement element for your oven model. The repair typically costs $20-50 for the part versus $150-350 for professional service.
This often occurs when one leg of the 240-volt power supply is interrupted while the other leg powers the display and lights. Check your circuit breaker to ensure both legs are functioning. Other causes include a blown thermal fuse, faulty temperature sensor (should read 1,080 ohms at room temperature), or a failed control board that isn’t sending power to the heating elements.
Electric ovens operate on dangerous 240-volt current that can be fatal. Always disconnect power at the circuit breaker and verify the oven display, lights, and clock are completely off before starting any work. Never attempt repairs while connected to power. Use insulated tools, wear safety gloves, and if you’re uncomfortable with electrical work, contact a qualified professional technician.