Last updated: September 08, 2025
Part 1: Understanding the Fire Hazard & DIY Preparation
Key Point: Lint buildup in dryer vents restricts airflow, traps heat, and creates one of the leading causes of home fires annually, accounting for thousands of incidents, injuries, and millions in property damage.
Overview: In this section, you’ll learn why clogged vents are dangerous, how to recognize the warning signs, and how to prepare your dryer for a safe cleaning procedure.
Why Dryer Vent Cleaning Matters
Every year, tens of thousands of home fires start in laundry areas due to malfunctioning dryers and accumulated lint in vents. Lint is highly flammable; when it builds up on the interior walls of the vent hose or duct, the dryer’s exhaust heat can ignite it. Flames can then leap through ductwork into walls and ceilings, often burning undetected until they spread.
Beyond fire risk, restricted vents cause longer drying cycles, higher energy bills—sometimes up to 20–30% more per load—excess wear on dryer parts, and buildup of humidity or mildew in your laundry room. A well-maintained vent system ensures safe operation, saves money, and extends dryer lifespan.
Energy Savings Breakdown: A clean vent can reduce drying times by up to 50%, cutting average energy costs by over \$80 per year for a typical household. Over five years, that’s nearly $400 in savings, offsetting the cost of a professional cleaning service or DIY kit.
Environmental Impact: Shorter drying cycles not only save energy but also reduce greenhouse gas emissions from power plants. Each load cleaned with an optimized vent system emits approximately 1.5 kg less CO₂, adding up to significant reductions over dozens of loads annually.
Case Study: In a suburban home, a 15-year-old vent hose had never been cleaned. The homeowner noticed drying times increasing from 30 to 75 minutes. An annual inspection revealed a six-inch-thick lint log in a 12-foot duct run. After cleaning, drying times returned to 30 minutes, and the homeowner estimated \$100 saved in annual energy costs.
Signs Your Dryer Vent Is Clogged
Longer Drying Times
If a load that once dried in 30 minutes now takes 60–90 minutes, airflow is likely restricted by lint.
Excessive Heat
Feel the dryer exterior: if it’s hot enough to burn, the vent may be blocked and causing heat buildup.
Weak Vent Flap Movement
Outside, the vent flap barely opens or pulses slowly rather than swinging open fully, indicating weak airflow.
Burning Smell
A faint burnt or chemical odor during operation indicates lint is overheating inside the duct.
Additional warning signs include increased humidity around the dryer, fabric still damp at the end of cycles, or tripped safety switches in modern dryers that detect overheating.
Pro Tip: Insert a thin mirror into the duct and use a flashlight to spot lint obstructions or damage visible behind the hose connection. This quick inspection takes under a minute and can confirm if deeper cleaning is needed.
Preparing for Cleaning
Unplug & Ventilate: Always disconnect power. For gas dryers, switch off the gas valve but do not disconnect the line to prevent leaks. Open windows or use a fan to clear dust.
Protect Yourself: Wear a dust mask rated N95, safety glasses, and work gloves. Lint can be irritating if inhaled or if it contacts eyes.
Clear the Area: Pull the dryer at least 12 inches from the wall. Lay down a drop cloth or old towels to catch lint and debris. Keep a flashlight, shop vacuum with crevice tool, and a vent cleaning kit nearby.
“I wish I’d known how easy it is to prevent dryer fires. Once I cleaned my vents, drying was faster and I felt safer.” — Homeowner testimonial
Disconnecting the Vent Hose
Loosen Fasteners
Use a flathead screwdriver or nut driver to loosen the metal band clamp or cut the foil tape securing the flexible hose at both the dryer outlet and wall duct. Keep hardware in a small container to avoid loss.
Inspect & Replace
Examine the hose for cracks, kinks, or crushing. If you see any damage or if it’s a plastic/foil hose, replace it with a smooth, rigid metal duct. Rigid duct minimizes bends, reducing lint traps and improving airflow.
Part 2: Deep Cleaning, Reassembly, & Professional Advice
Overview: This section guides you through using a vent cleaning kit for deep duct cleaning, how to reassemble your dryer, advanced tips for optimal airflow, and when to call professionals for thorough maintenance.
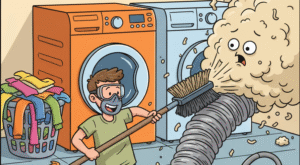
Using a Dryer Vent Cleaning Kit
-
1Assemble the Rods & Brush: Screw the brush head onto the first flexible rod. Ensure each rod clicks or screws in securely to avoid separation inside the duct.
-
2Insert & Rotate: Feed the brush into the duct at the dryer outlet, rotating clockwise as you push. The bristles will scrape lint away from walls while counterpressure helps dislodge stubborn debris.
-
3Extend with Additional Rods: Add another rod when you reach the limit of the first. Continue inserting and rotating until you either reach the exterior vent or feel resistance that indicates the end of the run.
-
4Vacuum & Inspect: With the brush removed, vacuum loose lint from both dryer outlet and exterior vent using a crevice tool. Shine a flashlight through the duct to ensure walls are clear and brush head is intact.
Tip: Running the vacuum from the exterior while pushing the brush from the interior captures dislodged lint and prevents it from settling back inside.
Advanced Tip: Use a high-powered leaf blower on low setting at the exterior vent while brushing from the interior. This airflow reversal pushes finer dust particles outward and ensures maximum cleanliness.
Reassembly & Final Testing
Reattach Hose: Slide the clean hose over the dryer outlet and wall duct, making sure it’s fully seated. Secure both connections with new stainless steel band clamps for a tight seal.
Return Dryer to Position: Carefully push the dryer back into place, avoiding any kinks or bends. Ensure the hose remains as straight as possible for optimal airflow.
Empty Test Cycle: Run a 10-minute no-lint load on high heat to purge any remaining dust. Observe the outdoor vent flap—it should open fully and expel air forcefully. Monitor dryer temperature to confirm it runs cooler and more efficiently.
Performance Check: Record the time for a small load. Compare to pre-clean times to quantify improvement. Log data to track efficiency over time and schedule future cleanings.
Professional Cleaning Recommendations
Annual Service
Even with DIY maintenance, schedule a professional inspection and deep cleaning once per year—especially for vent runs over 25 feet or with multiple bends that trap lint out of reach.
Heavy Usage Households
Homes with large families or frequent laundry loads benefit from biannual professional cleanings to maintain airflow, reduce energy costs, and keep the dryer operating safely.
Rotary Brush & Video Inspection
Professionals use high-powered rotary brushes and video cameras to locate and remove hidden lint in wall cavities and verify duct integrity—essential for long, complex runs in multi-story homes.
Cost Consideration: Professional services range from \$100–\$250 depending on vent length and complexity. Many homeowners find the investment worthwhile for peace of mind and insurance compliance.
Conclusion & Key Takeaways
Thesis Revisited: Routine cleaning of dryer vent hoses and ducts is vital to prevent fires, enhance performance, and save on energy costs.
- Inspect vents every 6–12 months or sooner if drying efficiency drops.
- Adopt rigid metal duct to minimize lint buildup and maximize airflow.
- Perform DIY cleaning with a flexible brush kit and vacuum to maintain basic cleanliness.
- Hire professionals annually for deep cleaning of long or complex vent runs.
- Monitor drying times, vent flap movement, and odors as ongoing safety checks.
- Track performance improvements to justify maintenance routines and budgeting.
With diligence, proper tools, and occasional professional help, you can dramatically reduce fire risk and keep your dryer running at peak efficiency for years to come.
Frequently Asked Questions
How often should I clean my dryer vent?
Clean every 6–12 months or sooner if you notice extended drying times, weaker vent airflow, or heat buildup.
Can I clean the vent without a kit?
A shop vacuum removes surface lint, but a flexible rod and brush kit scrubs interior duct walls for comprehensive cleaning.
Is it worth switching to rigid duct?
Yes—smooth metal duct reduces lint traps, enhances airflow by up to 30%, and significantly lowers fire risk compared to plastic or foil hoses.
When is professional service necessary?
Call a pro if your vent run exceeds 25 feet, has multiple bends, runs through attics or walls, or after DIY cleaning still yields poor airflow or high dryer temperatures.
Check us out for more at OneSourceApplianceParts.com