Is your Frigidaire oven displaying error codes or failing to heat properly? A faulty control board might be the culprit. This comprehensive guide walks you through replacing Frigidaire oven control board models 3164555 and 316455410, complete with safety precautions and troubleshooting tips.
1. Part Identification & Compatibility
Control Board Overview
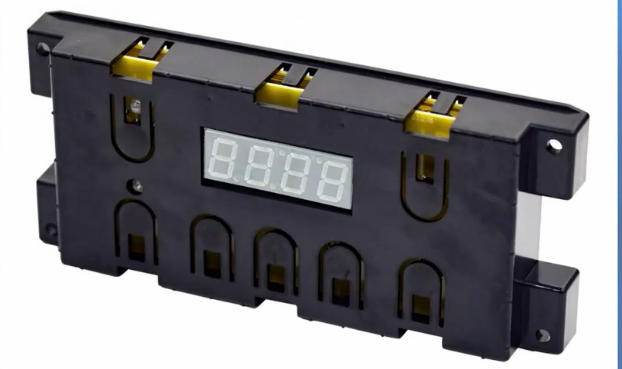
The Frigidaire 3164555 control board is the brain of your oven, managing temperature settings, timing functions, and display operations. Key components include:
- Ribbon cables
- Wiring harness connectors
- Digital interface circuitry
Compatible Models
This control board works with numerous Frigidaire models, including:
- Frigidaire Gallery Series (FGGF3054T, FFGF3054T)
- Select Kenmore ranges using Frigidaire components
- Various Electrolux models (verify with your model number)
Symptoms of Failure
You might need a replacement control board if experiencing:
- Oven fails to heat during bake or broil cycles
- Error codes appearing (particularly F10, F11)
- Unresponsive touchpad buttons
- Erratic or non-functioning display
2. Safety Precautions
⚠️ WARNING: Working with electrical appliances can be dangerous. Follow these critical safety steps:
- Disconnect Power: Unplug the oven or turn off the dedicated circuit breaker
- Discharge Capacitors: Use an insulated screwdriver to short capacitor terminals (if applicable)
- Anti-Static Protection: Wear an anti-static wrist strap to prevent damage to sensitive electronic components
- Allow Cooling: Ensure the oven has completely cooled before beginning work
3. Tools & Materials Needed
Replacement Part
You’ll need the correct Frigidaire control board:
-
- Frigidaire 3164555 Control Board
- Alternative part number: 316455410
🔧 Recommended Part: Frigidaire 3164555 Oven Control Board (OEM Compatible) – Top-rated replacement with 4.7-star reviews. Save 40% vs dealer prices!
Required Tools
Gather these tools before starting:
- Phillips screwdriver (#2)
- Needle-nose pliers
- Multimeter (for continuity testing)
- Putty knife (for overlay transfer)
- Digital camera or smartphone (for reference photos)
🔧 Recommended Tools: Phillips Screwdriver Set | Digital Multimeter – Essential appliance repair tools
Optional Equipment
- Anti-static wrist strap
- Flashlight or headlamp
- Magnetic parts tray
🔧 Recommended: Anti-Static Wrist Strap – Protect sensitive electronics from static damage
4. Step-by-Step Replacement Guide
Step 1: Remove Back Panel/Control Console
1 Locate and remove the six ¼” hex screws from the rear panel (two on each side, two on top/middle)
2 Gently lower the panel to access the control board
Step 2: Disconnect Wiring Harnesses
1 Take photos of all connections for reference before disconnecting anything
2 Label ribbon cables and connectors with tape or markers
3 Use needle-nose pliers to carefully unplug all harnesses
Step 3: Remove Old Control Board
1 Unscrew the four Phillips screws securing the board
2 Lift the board out carefully, noting any adhesive overlays that need to be preserved
Step 4: Install New Control Board
1 If necessary, transfer the overlay from the old board using a putty knife (peel gently)
2 Secure the new board with the four screws
3 Reconnect all labeled wiring harnesses and ribbon cables
Step 5: Reassemble and Test
1 Replace the back panel and secure with all six screws
2 Restore power to the oven
3 Test oven functions, particularly the bake and broil modes at 350°F
5. Troubleshooting Post-Installation
No Heat Issues
If your oven still isn’t heating after board replacement:
- Verify all wiring connections are secure
- Test bake/broil elements with a multimeter (should read 10–20Ω resistance)
- Check for blown thermal fuses
Persistent Error Codes
If error codes continue to appear:
- Perform a hard reset: unplug the oven for 5 minutes, then reconnect
- Check temperature sensors for proper resistance values
- Ensure the overlay is properly aligned on touch controls
Warranty Considerations
Keep in mind that OEM parts typically include a 1-year warranty, while generic replacements may only offer 90 days of coverage.
6. Maintenance Tips
Extend the life of your new control board with these maintenance practices:
- Avoid liquid spills on the control panel
- Clean vents regularly to prevent overheating
- Check for firmware updates on Frigidaire’s support site
- Protect from power surges with a surge protector
7. FAQ Section
Can I use a generic control board?
No—Frigidaire’s proprietary firmware may conflict with third-party boards, causing malfunctions or safety issues. Always use genuine OEM parts for optimal performance and safety.
How long does replacement take?
Expect to spend 30–60 minutes on this repair, depending on your model and experience level. Having all tools ready and taking reference photos can significantly reduce completion time.
Will I lose my custom settings?
Yes, replacing the control board will reset all custom settings. Be prepared to reprogram any favorite cooking presets after installation.
Can I repair the board instead of replacing it?
While specialized repair services exist, board-level repairs require advanced soldering skills and diagnostic equipment. Replacement is the more reliable and cost-effective solution for most homeowners.
8. Safety Note
If wiring appears damaged or capacitors look swollen, contact a licensed technician immediately. Some electrical repairs are best left to professionals, especially if you’re uncertain about any aspect of the procedure.
Conclusion
Replacing your Frigidaire oven control board (models 3164555 and 316455410) is a straightforward DIY project that can save you hundreds in repair costs. By following our detailed guide, you’ll restore full functionality to your oven while avoiding costly service calls.
Remember to prioritize safety at every step, use genuine replacement parts, and test thoroughly after installation. With proper maintenance, your new control board should provide years of reliable service.
Check us out for more appliance repair guides at OneSourceApplianceParts.com