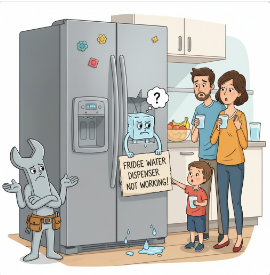
Is your fridge water dispenser not working? Start by replacing the water filter, then check the supply line and test system components. Step-by-step troubleshooting saves time and prevents unnecessary part replacements.
“Over 80% of refrigerator dispenser problems can be resolved with simple maintenance and systematic diagnosis.”
Understanding Your Water Dispenser System
- Water supply line: Connects your home’s plumbing to the refrigerator inlet valve
- Water inlet valve: Electronically controlled valve that opens when activated
- Water filter: Removes impurities, sediment, and contaminants from incoming water
- Internal tubing: Routes water through the freezer compartment and door assembly
- Dispenser mechanism: Includes switch, paddle, and control electronics
- Water reservoir: Stores chilled water for immediate dispensing
The water journey begins at your home’s main water supply, travels through a dedicated line to the refrigerator, passes through filtration, and reaches the dispenser through internal tubing that often runs through freezer compartments. When any component fails, it affects the entire system’s performance.
Critical First Steps
1. Replace the Water Filter
- 1
Locate filter housing – typically inside refrigerator or behind front grille - 2
Turn off water supply to prevent pressure surges during replacement - 3
Remove old filter by twisting counterclockwise, ensuring proper seating of new filter - 4
Flush system – run 2-3 gallons through to clear air bubbles and carbon particles - 5
Reset filter indicator according to your refrigerator manual
2. Inspect the Water Supply Line
Safety Protocol:
- Unplug refrigerator completely
- Turn off water supply valve
- Move refrigerator slowly to avoid additional damage
- Have towels ready for potential water spillage
Inspection Checklist:
- Sharp bends or kinks in tubing
- Compression damage from pinching
- Signs of wear near connection points
- Adequate service loop behind refrigerator
Step-by-Step Troubleshooting
Test the Water Inlet Valve
Pressure Testing:
- Disconnect water line at valve inlet
- Should fill 2/3 cup in 10 seconds minimum
- Inadequate flow indicates supply line issues
Electrical Testing:
- Use multimeter set to resistance (Ohms)
- Normal reading: 500-1,500 Ω for most valves
- Infinity reading = open circuit (failed valve)
- Zero reading = short circuit (failed valve)
Frozen Water Lines
Diagnostic Steps:
- Airflow Test: Disconnect line and attempt blow test
- No airflow: Indicates frozen blockage in door assembly
- Location: Most common in side-by-side and French door models
Professional Thawing Methods:
- Hair Dryer: Use lowest heat setting, 15-30 minutes
- Warm Water Injection: Use syringe with aquarium tubing
- Temperature Control: Maintain 0°F to 10°F in freezer
Advanced Diagnostics & Component Testing
Dispenser Switch Testing
Location and Access: The dispenser switch is located behind the dispenser control panel and usually requires removing the front control panel cover.
Multimeter Testing Procedure:
- Unplug refrigerator and remove switch access panel
- Identify terminals (most switches have 2-3 terminals)
- Set multimeter to continuity or lowest resistance
- Press switch while testing between terminals
- Should show continuity when pressed, open when released
Paddle Assembly Inspection
Physical Issues: For paddle-style dispensers, mechanical problems can prevent proper switch activation even when electrical components function correctly.
Common Paddle Problems:
- Physical Sticking: Beverage residue, food particles, temperature warping
- Broken Mechanisms: Cracked paddle body, broken return springs, disconnected linkage
Cleaning Process:
- Visual assessment for damage, cracks, or debris
- Movement test – should move smoothly without binding
- Spring action – should return quickly to neutral
- Clean with mild detergent and soft brush
- Light food-safe lubricant on pivot points if needed
Advanced Electronic Troubleshooting
Control Board Diagnosis
Modern refrigerators use sophisticated control boards to manage dispenser functions, integrate with door sensors, and coordinate with ice maker operations.
Symptoms of Control Board Issues:
- Multiple dispenser functions fail simultaneously
- Non-functioning display or indicator lights
- Erratic behavior or intermittent operation
- Complete system shutdown
Testing Protocol:
- Check power supply to board (typically 12V or 24V)
- Verify all wire connections are secure
- Look for signs of burn damage or corrosion
- Test with known good components when possible
Door Switch Integration
Water dispensers include safety interlocks that prevent operation when doors are open, preventing potential flooding and ensuring safe operation.
Door Switch Testing:
- Manual Test: Open door and observe if interior lights turn off when switch is pressed
- Multimeter Test: Test switch continuity in open and closed positions
- Magnetic Sensors: Use strong magnet to test sensor activation
Types of Door Switches:
- Mechanical push-button switches
- Magnetic reed switches
- Hall effect sensors
- Optical sensors (in newer models)
Water Pressure & Supply Considerations
Minimum Pressure Requirements
Minimum Required
Optimal Range
RO Systems
Pressure Testing Methods:
- Professional Gauge: Most accurate method, connects directly to supply line
- Flow Rate Test: Fill measured container for timed measurement
- Comparative Test: Check other faucets in home for pressure consistency
Water Quality Impact on Performance:
Hard Water Effects:
- Mineral buildup in valves and lines
- Reduced filter life expectancy
- Scale formation in heating elements
- Calcium deposits in narrow passages
Sediment Issues:
- Premature filter clogging
- Valve seat damage from particles
- Line blockages in narrow tubing
- Abrasive wear on moving parts
Comprehensive Maintenance & Prevention
Monthly Tasks
- Run 1-2 gallons through system
- Clean dispenser area thoroughly
- Check for unusual noises
- Test dispenser flow rate
- Inspect external connections
Every 6 Months
- Replace water filter religiously
- Inspect visible water lines
- Test dispenser pressure
- Clean internal components
- Check door seals and sensors
Annual Maintenance
- Professional system inspection
- Water quality testing (well water)
- Internal component evaluation
- Pressure booster assessment
- Complete system flush
Seasonal Considerations
Winter Precautions:
- Monitor for frozen lines during cold snaps
- Ensure adequate kitchen heating near refrigerator
- Consider insulation improvements for problematic models
- Check door seals for heat loss
- Adjust freezer temperature if necessary
Summer Preparations:
- Increased filter replacement frequency
- Monitor for condensation issues
- Check cooling system performance
- Verify adequate ventilation around unit
- Test pressure during peak usage times
Problems solved with filter + basic maintenance
Issues diagnosed with multimeter + visual inspection
Cases requiring professional service
When to Call Professional Service
Safety Red Flags
- Electrical Issues: Multiple component failures, unusual behavior, burning smells, or sparking
- Water Damage Risk: Internal leaks, flooding during repairs, or inability to locate shutoffs
- Structural Damage: Cracked housings, damaged door assemblies, or compromised seals
Cost-Benefit Analysis
- DIY Limits: Component costs exceeding 50% of refrigerator value
- Warranty Concerns: Newer units under manufacturer warranty
- Professional Benefits: Labor warranties, diagnostic equipment, model-specific experience
“Following this systematic troubleshooting guide saved me $300 in service calls. The filter replacement and line inspection solved my dispenser issue completely. The step-by-step approach made it manageable even for a novice.”
— Sarah M., Verified Customer
Summary & Key Takeaways
- Always start with filter replacement if over 6 months old
- Verify water supply line condition before complex diagnostics
- Use proper multimeter techniques for accurate electrical testing
- Address frozen line problems promptly to prevent damage
- Maintain regular cleaning and inspection schedule
- Document troubleshooting steps for future reference
Frequently Asked Questions
Why does my refrigerator water dispenser suddenly stop working?
How can I prevent frozen water lines in my refrigerator?
Are refrigerator water dispenser repairs typically DIY-friendly?
How often should I replace my refrigerator water filter for optimal performance?
Check us out for more expert solutions at OneSourceApplianceParts.com