Are you dealing with a GE washer that won’t start or a door that won’t latch properly? The problem might be a faulty door latch assembly. This comprehensive guide will walk you through replacing your GE door latch assembly (OEM 290D1580P001 / WH01X27954) quickly and affordably, saving you from costly service calls. Whether you’re a DIY enthusiast or a first-time appliance repairer, this step-by-step tutorial will help you restore your GE washer to proper working condition in under an hour.
Understanding Your GE Door Latch Assembly
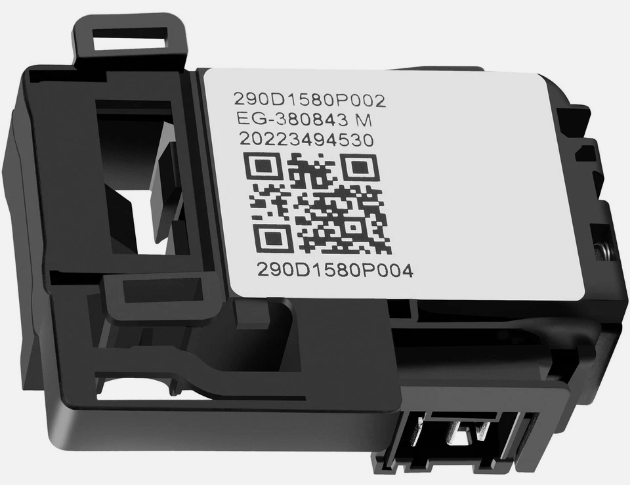
The GE door latch assembly (290D1580P001 / WH01X27954) plays a crucial role in your appliance’s operation. It secures the door during cycles, ensures safety while the machine is running, and activates sensors that enable your washer to operate. Without a properly functioning latch, your washer’s control board won’t receive the signal that the door is closed, preventing operation altogether.
This small but essential component consists of a locking mechanism that engages with a strike plate, along with electrical contacts that communicate with your appliance’s control systems. Over time, these mechanisms can wear out or break due to repeated use, causing various operational issues.
Signs of a Faulty Door Latch
- Door won’t close or latch properly – You might hear clicking sounds without the door securing fully
- Appliance won’t start because sensors detect an open door, even when the door appears closed
- Error codes appear, such as “LD” (lid/door lock failure) on your washer’s display panel
- Cycles interrupt unexpectedly during operation when the latch intermittently fails
- Unusual noises come from the door area during attempted latching
Identifying these symptoms early can save you from more costly repairs down the line. A faulty door latch not only prevents your washer from operating but can also lead to water leakage if the door opens during a cycle.
⚠️ SAFETY FIRST
Always unplug your washer or dryer before beginning any repair work to avoid electrical hazards! Water and electricity create a dangerous combination, so ensure the appliance is completely disconnected from power before proceeding with any internal access or component replacement.
Tools & Materials You’ll Need
Essential Tools
- Phillips screwdriver – For removing panel screws and securing the new latch
- Putty knife – To carefully release clips without damaging panels
- Needle-nose pliers – For handling small connectors and wires safely
- Multimeter – To test the old latch for continuity and confirm failure
- Smartphone or camera – To document wire connections before disconnecting
- Work gloves – To protect your hands from sharp edges
Required Parts
- OEM part number: 290D1580P001 or WH01X27954 (interchangeable)
- Compatible with: GE GTW220ACK*, GTW460ASJ*, Hotpoint HTW200ASK* models and many others
- Price range: $25-$80 (depending on retailer)
- Recommended retailers: GE Parts Store, Repair Clinic, authorized appliance parts dealers
Note: Using genuine OEM parts ensures proper fit and function, while aftermarket alternatives may save money but could reduce reliability or lifespan.
Step-by-Step Replacement Guide
Unplug the Appliance
Disconnect power to your appliance by unplugging it from the wall outlet to prevent electrical hazards during repair. If your washer is hardwired or difficult to unplug, turn off the appropriate circuit breaker in your home’s electrical panel. Wait at least 5 minutes for any residual electrical charge to dissipate before proceeding.
Access the Door Latch
For Top-Load Washers:
- Lift the lid and insert a putty knife under the top panel’s front edge to release the retaining clips
- Apply gentle pressure until you hear a clicking sound as each clip releases
- Slide the panel forward 1-2 inches, then lift upward to expose the latch assembly
- Be careful not to damage any wiring while removing the panel
For Front-Load Units:
- Remove the soap dispenser drawer by pressing the release tab and pulling it out completely
- Locate and remove the screws securing the top panel (typically 2-3 screws at the rear)
- Slide the top panel backward about an inch, then lift it off
- For some models, you may need to remove a front panel or trim piece to fully access the door latch area
Each GE model may have slight variations in panel access. If you encounter difficulty, consult your appliance’s user manual for specific disassembly instructions.
Document Wiring Connections
Before disconnecting any wires, take clear photos of all wire connections from multiple angles. Pay particular attention to:
- Wire colors and their connection points
- Orientation of connectors and plugs
- Position of any clips or fasteners
This critical step will make reassembly much easier and prevent costly errors. Many GE door latches use a multi-pin connector that must be oriented correctly during reinstallation.
Test the Old Latch
Before removing the old latch, confirm it’s truly faulty by testing with a multimeter:
- Set your multimeter to the continuity or resistance (Ω) setting
- Disconnect the wire harness from the latch
- Touch the multimeter probes to the appropriate terminals on the latch connector
- Manually activate the latch switch while testing
A properly functioning latch should show continuity (near zero resistance) when closed and no continuity (infinite resistance) when open. No change in readings when activating the latch confirms it’s faulty and needs replacement.
Remove the Old Latch
- Unplug the wire harness from the old latch by pressing the release tab and gently pulling
- Remove the mounting screws (typically 2-3 Phillips head screws) that secure the latch to the door frame
- For front-load models, you may need to peel back the door gasket partially to access all the mounting screws
- Carefully lift out the old latch assembly, noting its orientation and position
If the latch is stuck or difficult to remove, check for hidden fasteners or clips that may be securing it. Never force removal as this could damage surrounding components.
Install the New Latch
- Inspect the new OEM latch (290D1580P001 / WH01X27954) and compare it to the old one to verify it’s the correct replacement
- Position the new latch in the same orientation and location as the original
- Insert and tighten all mounting screws, being careful not to overtighten and crack the plastic housing
- Reconnect the wire harness, ensuring it clicks securely into place
- Make sure the locking bar extends outward for proper engagement with the strike plate
- Verify that the latch moves freely without binding or sticking
During installation, be careful not to pinch any wires between the latch assembly and mounting surface. Proper alignment is crucial for reliable operation.
Reassemble and Test
- Reattach all panels and parts you removed during disassembly in reverse order
- Make sure all clips engage properly and panels sit flush
- Secure all screws without overtightening
- Ensure no wires are pinched between panels
- Plug in the appliance and restore power
- Test the door latch by opening and closing the door several times, listening for a solid click
- Run a short rinse cycle to verify the washer recognizes the closed door and operates normally
If the door latches properly and the washer completes a cycle without errors, congratulations—you’ve successfully replaced the door latch assembly!
Troubleshooting Post-Installation
Door Still Won’t Latch?
If you’re still experiencing issues after installing the new latch, try these troubleshooting steps:
- Check alignment of the strike plate and door hinges. Even slight misalignment can prevent proper latching. Loosen mounting screws, adjust as needed, then retighten.
- Inspect wiring for loose connections or damaged wires. Ensure all connectors are fully seated and wires aren’t pinched or frayed.
- Verify proper voltage at the latch connector using a multimeter. The latch typically requires 120V to operate correctly.
- Check control board functionality by testing for proper signals to the latch mechanism. A faulty control board might not send the correct commands to engage the latch.
- Test door sensors with a multimeter to ensure they’re detecting the door’s position accurately.
For persistent errors or if your washer displays error codes after replacement, consider consulting a qualified technician who can diagnose more complex electrical issues.
Cost & Time Savings
DIY Cost
$25-$80
for the OEM latch assembly
Genuine GE replacement parts typically cost between $25-$80 depending on the retailer and your specific model. While third-party alternatives may be available for less, OEM parts are recommended for reliability and proper fit.
DIY Time
30-60 minutes
vs. $100+ for professional service
Professional appliance repair services typically charge $75-$150 for a service call, plus parts and labor. By completing this repair yourself, you’ll save at least $100 and avoid the inconvenience of scheduling and waiting for a technician.
Conclusion
Replacing your GE door latch assembly (OEM 290D1580P001 / WH01X27954) is a straightforward DIY project that can save you significant time and money. By following this comprehensive guide, you’ll restore your appliance’s functionality without the need for costly professional repairs.
Regular maintenance and prompt replacement of worn components like door latches not only keeps your appliance running efficiently but also prevents more serious damage that could result from continued operation with faulty parts. The door latch assembly is a critical safety component, ensuring that your washer cannot operate when the door is open and preventing water leakage during cycles.
Remember to always prioritize safety by unplugging your appliance before beginning any repair work, and consult a qualified technician if you encounter persistent electrical issues after installation. With the right tools, parts, and this guide, you’ve successfully extended the life of your GE appliance and gained valuable DIY repair skills in the process.
Frequently Asked Questions
How do I know if my GE washer’s door latch needs replacement?
Common signs include the door not latching properly, the washer not starting because it can’t detect a closed door, and error codes like “LD” appearing on the display. If your washer won’t complete cycles or makes clicking sounds without latching, these are also indicators of a faulty latch assembly. In some cases, you might notice the door opening during cycles or the washer stopping unexpectedly mid-cycle.
Are the part numbers 290D1580P001 and WH01X27954 interchangeable?
Yes, these part numbers are cross-compatible. Both 290D1580P001 and WH01X27954 refer to the same GE door latch assembly and can be used interchangeably for compatible GE and Hotpoint models. The different numbers represent manufacturer and retailer inventory designations for the same component. Always verify compatibility with your specific model number before purchasing.
Can I replace the GE door latch without removing the top panel?
In most cases, no. Accessing the door latch assembly typically requires removing the top panel on top-loading washers or portions of the front panel on front-loading models. This provides the necessary clearance to disconnect the old latch and install the new one properly. Attempting shortcuts might damage other components or result in improper installation of the new latch.
How long will a replacement GE door latch last?
With proper installation and regular maintenance, a genuine OEM GE door latch assembly (290D1580P001 / WH01X27954) should last 3-5 years under normal usage conditions. Using authentic OEM parts rather than third-party alternatives helps ensure optimal performance and longevity. Factors affecting lifespan include frequency of use, gentleness when opening/closing the door, and environmental conditions such as humidity levels in your laundry area.
Last updated: April 23, 2025
Check us out for more appliance repair guides and OEM parts at OneSourceApplianceParts.com